DOCS / TUTORIALS
Make a cabinet with drawers
In this tutorial, you make a low cabinet to go with your bookcase. It has the same width, depth and base, a cupboard on one side and four drawers on the other. You choose real drawer runners, give the drawers dovetailed boxes, and get the workshop pack with a marking template for each dovetail.
You need about 20 minutes. Do Your first bookcase first: this tutorial uses the Layout section that you read there. The cabinet is a new project, so your bookcase does not change.
Start the cabinet#
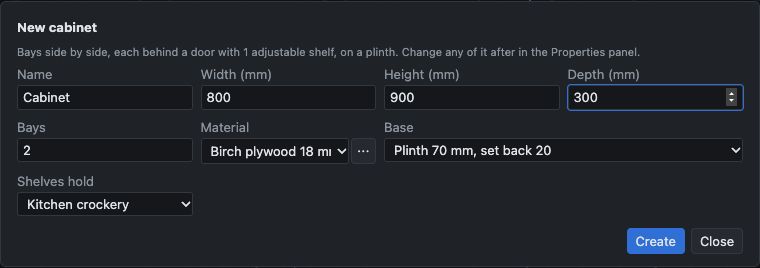
The cabinet stands next to the bookcase, so it has the same width and depth. The Cabinet form makes a cabinet with a door on each bay.
- Click File.
- Move the pointer to New.
- Click Cabinet….
- In Name, type
Cabinet. - In Width (mm), type
800. - Do not change Height (mm) (900).
- In Depth (mm), type
300. - Examine Bays. It shows 2.
- Examine Base. It shows Plinth 70 mm, set back 20, the same base as the bookcase.
- Click Create.
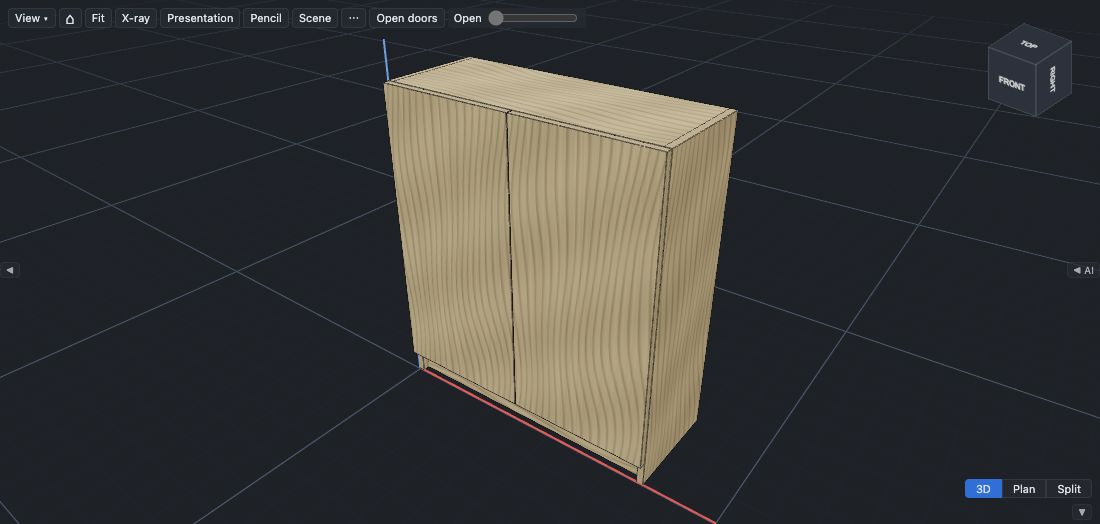
A new project opens with the cabinet. It is 900 mm high, with a divider in the middle. In the Layout section, the grid has two cells, A1 and B1. Each cell shows Shelves + door · 1: one shelf behind a door. Each door is 827 × 397 mm.
Put drawers in the right cell#
Cell A1 keeps its door and shelf: it is the cupboard. Cell B1 gets four drawers. With four drawers, each dovetail template fits on an A4 sheet at 1:1.
- In the Layout section, click cell B1 in the grid.
- Click Contents….
- At Contents, select Drawers.
- In Number of drawers, type
4. - Click Apply to B1.
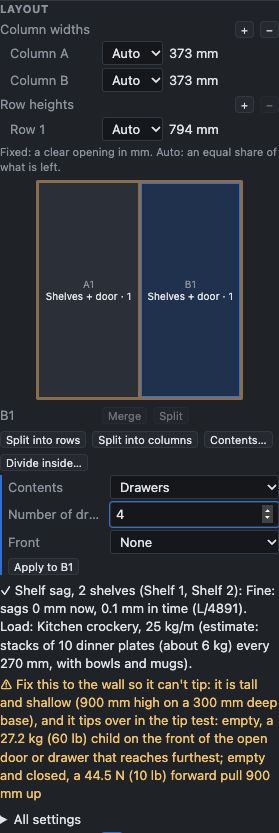
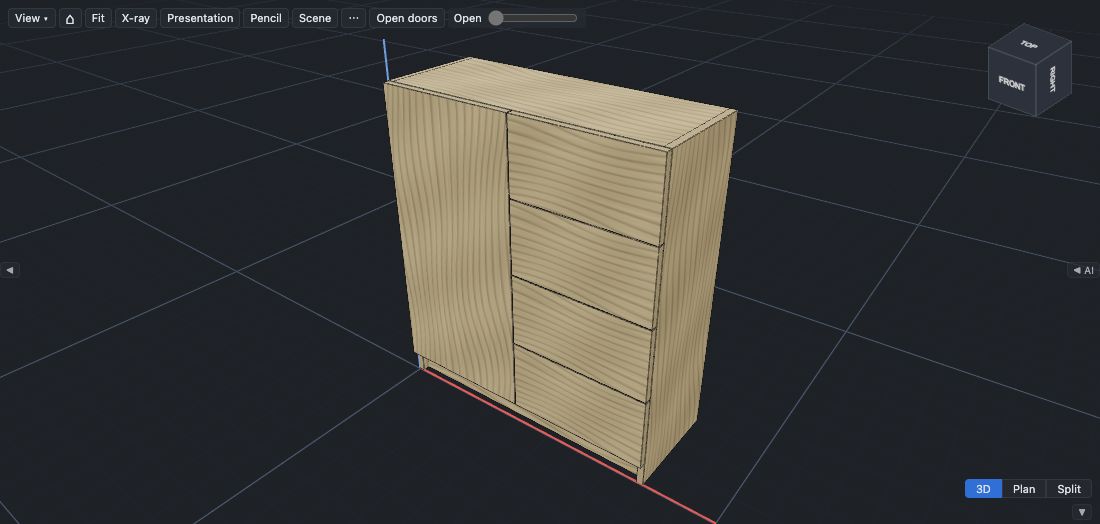
Cell B1 now shows Drawers · 4. It has four drawer fronts, each 397 × 204.5 mm, and no door. Cell A1 keeps its door and shelf. The cut list is now Cut list (33).
Choose the runners and the joints#
The runners that you buy set the size of each drawer box, so choose them before you cut. Use the Blum TANDEM undermount runners: they go under the box, and you do not see them.
- In the Layout section, click All settings.
- In the group Drawers, at Runners, select Blum TANDEM, undermount.
- In the group Joints, at Drawer box corners, select Dovetail.
- Below the Layout section, click Calculated sizes.
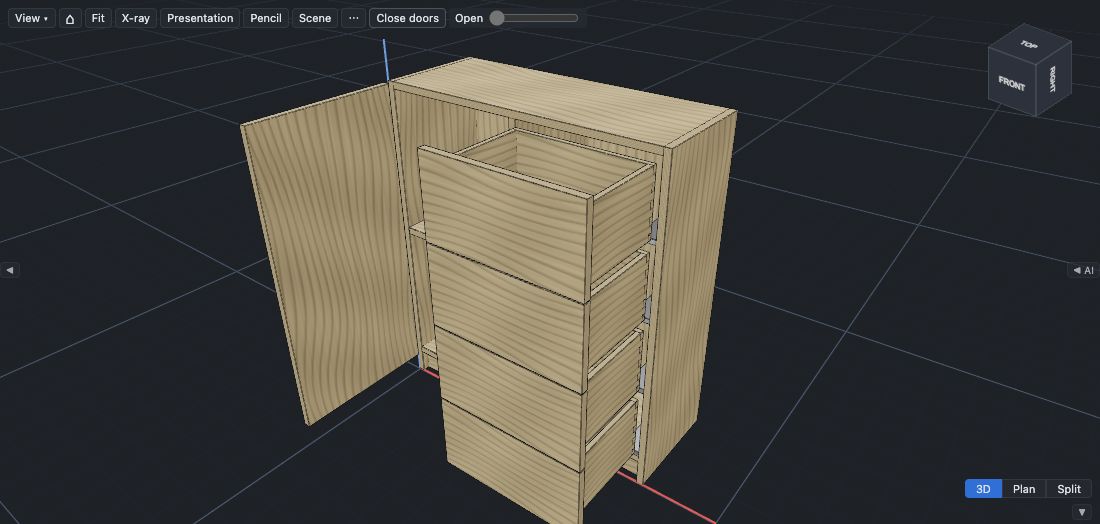
- Click Open doors above the 3D view.
The door swings open and the drawers slide out on their runners. In Calculated sizes, Runner pair to buy shows 560H2700B, the part number of the runner pair. Drawer box shows the size of each box: 355 wide, 168.5 high and 260 deep. The case is joined with dowels, as on the bookcase.
The checks under the grid now say to fix the cabinet to the wall. With its doors and drawers open, a child who hangs on a door can tip the cabinet forward.
Each box front is half-blind dovetailed, so the tails do not show on the front. Each back is through-dovetailed. The notes of each drawer side in the cut list give the runner. For the other runners, see Add drawers to a carcass.
Make a cutting plan#
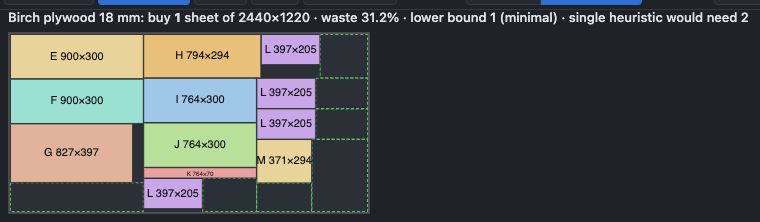
The cutting plan tells you which sheets to buy for the case, the drawer boxes and the backs.
- In the manufacturing panel, click Whole project.
- Click the Cutting plan tab.
- Click Optimise cuts.
The cabinet uses three materials. You buy 1 sheet of 2440 × 1220 mm of each. The 18 mm birch plywood is for the case, the door and the drawer fronts. The 12 mm is for the drawer boxes, and the 6 mm is for the back and the drawer bottoms.
Get the workshop pack#
The workshop pack is one PDF with everything that you take to the workshop.
- Click Pack PDF in the manufacturing panel.
Your browser downloads a file with a name like Cabinet-rev9-workshop.pdf. Open it. It has the cut list, the list of hardware to buy, a drawing of each part, the joints and the cutting diagrams.
Mark out a dovetail from the template#
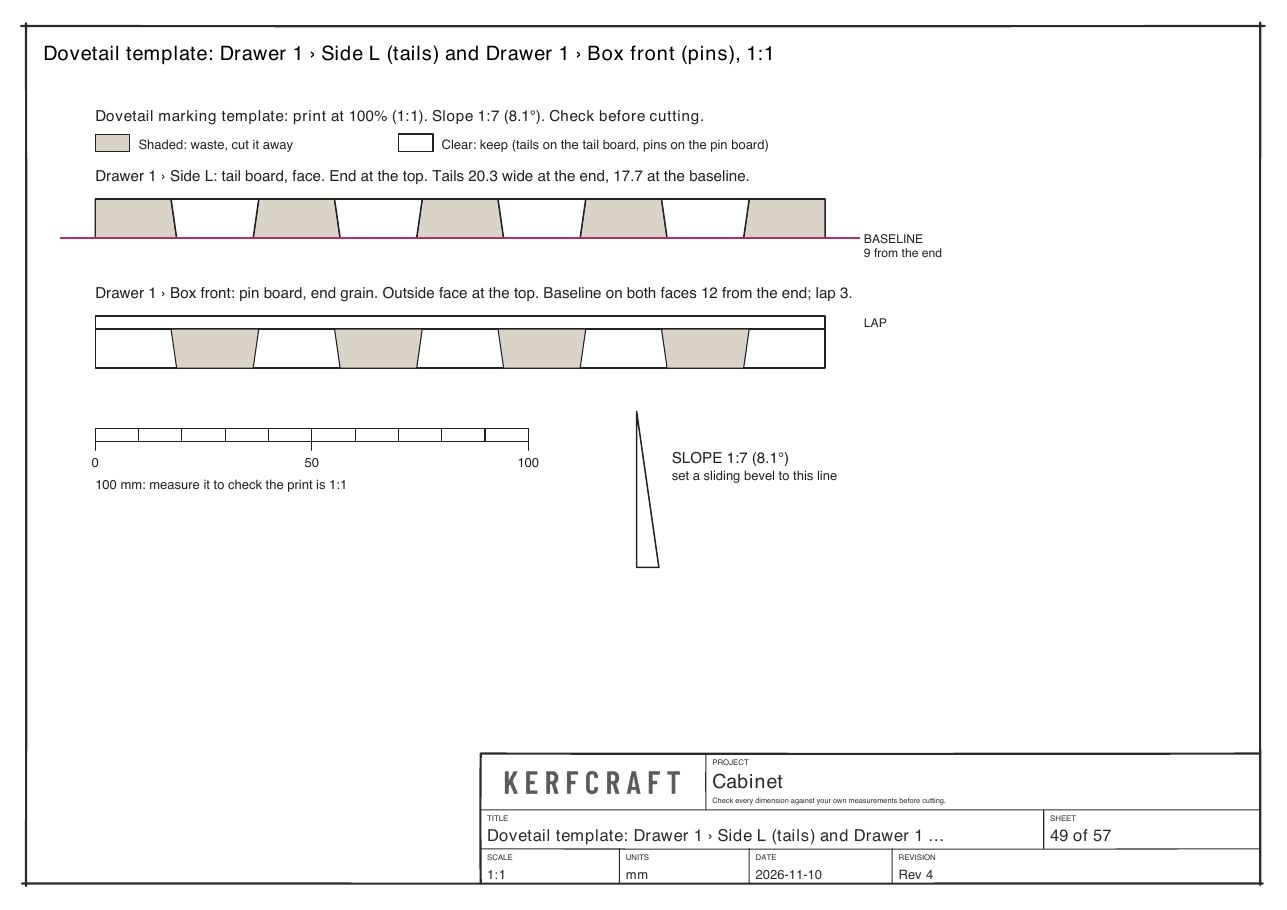
You mark the dovetails from a template, so that each one matches the drawing. Near the end of the pack, there is a 1:1 template for each dovetailed corner of each drawer. The first one is "Dovetail template: Drawer 1 › Side L (tails) and Drawer 1 › Box front (pins), 1:1".
- Print the template sheet at 100%.
- Measure the 100 mm scale bar. If it is not 100 mm, examine the printer settings and print again.
- Read the top drawing. It is the drawer side, with the tails and the baseline 9 mm from the end.
- Read the lower drawing. It is the end of the box front, with the pins and a 3 mm lap.
- Set a sliding bevel to the SLOPE 1:7 line.
The shaded areas are waste. The four drawers are the same, so you need only the templates of one drawer. To cut the joint, see Cut dovetails. Check every dimension against your own measurements before cutting.
Save the cabinet#
The cabinet is a new project. It is not in your project list until you save it.
- Click File.
- Click Save….
- Examine Name. It shows
Cabinet. - Click Save.
The Draft label goes away. The cabinet and the bookcase are now two projects in File ▸ All projects….
What you learned#
- File ▸ New ▸ Cabinet… makes a cabinet with a door on each bay.
- In the Layout grid, you select a cell and set its Contents…, for example drawers in place of a door.
- The runners set the size of each drawer box, and Calculated sizes shows the part number to buy.
- The workshop pack has a 1:1 dovetail template for each drawer corner.
Next, put your bookcase in a room in Put your bookcase in a room.