DOCS / TUTORIALS
Your first bookcase
In this tutorial, you change the width of a bookcase and get the parts to cut for it. You learn how a parameter controls a design, and where to find the cut list, the cutting plan and the CSV export.
You need about 10 minutes. You do not need to know how to draw in KerfCraft.
The pictures show the UK region with sizes in mm. In other regions, the materials can have different names.
Open KerfCraft#
- Go to kerfcraft.app/workshop and sign in.
- Look at the screen. The Model panel is at the top left, and the Properties panel is below it.
- Look at the 3D view in the middle. The manufacturing panel with the cut list is below it.
- If Units in the Properties panel does not show mm, select mm.
KerfCraft is in beta. Sign-in is by invitation.
Open the bookcase#
The bookcase in this tutorial comes from the carcass generator. A generator makes all the parts of a cabinet from a small set of parameters.
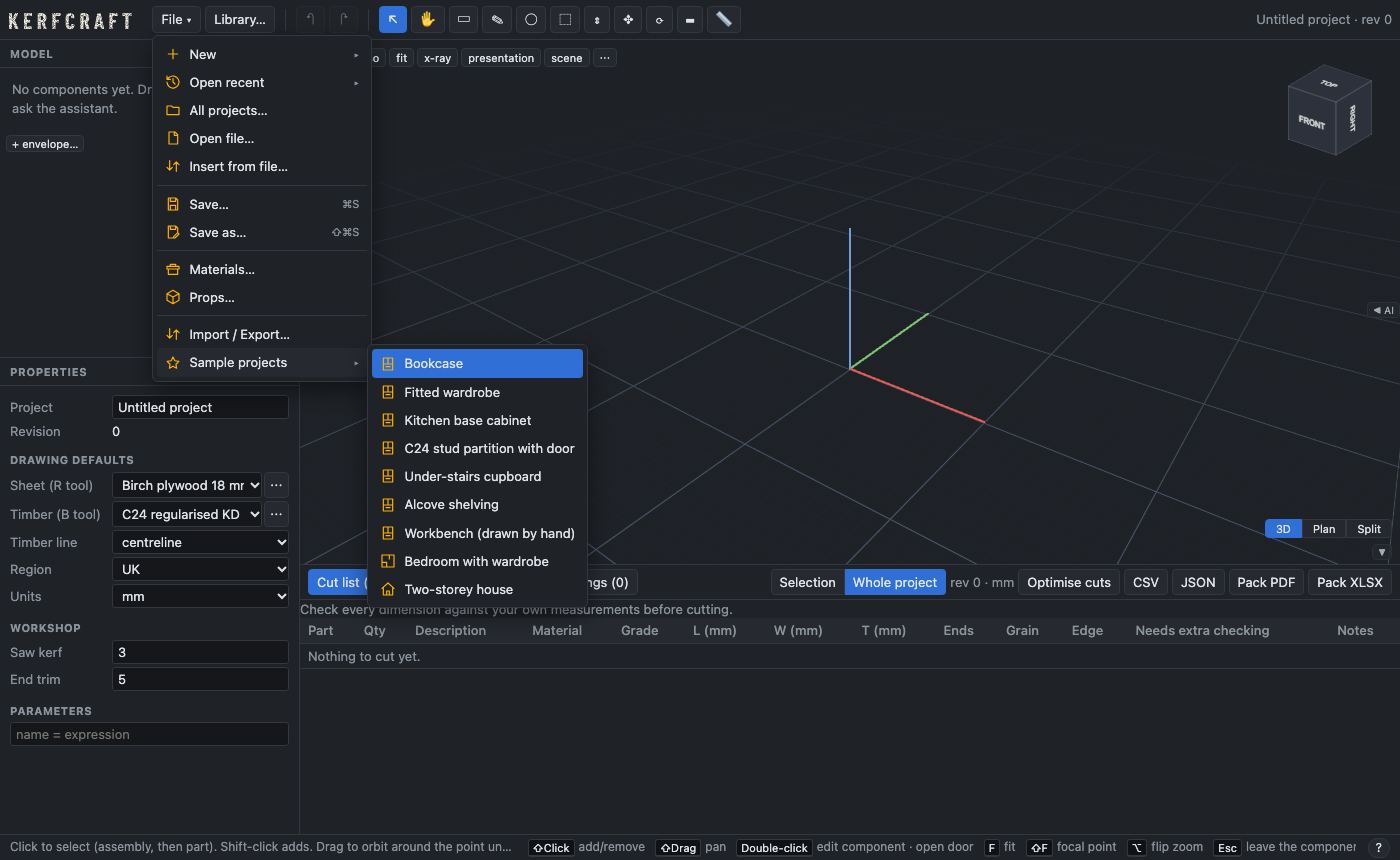
- Click File.
- Move the pointer to Sample projects.
- Click Bookcase.
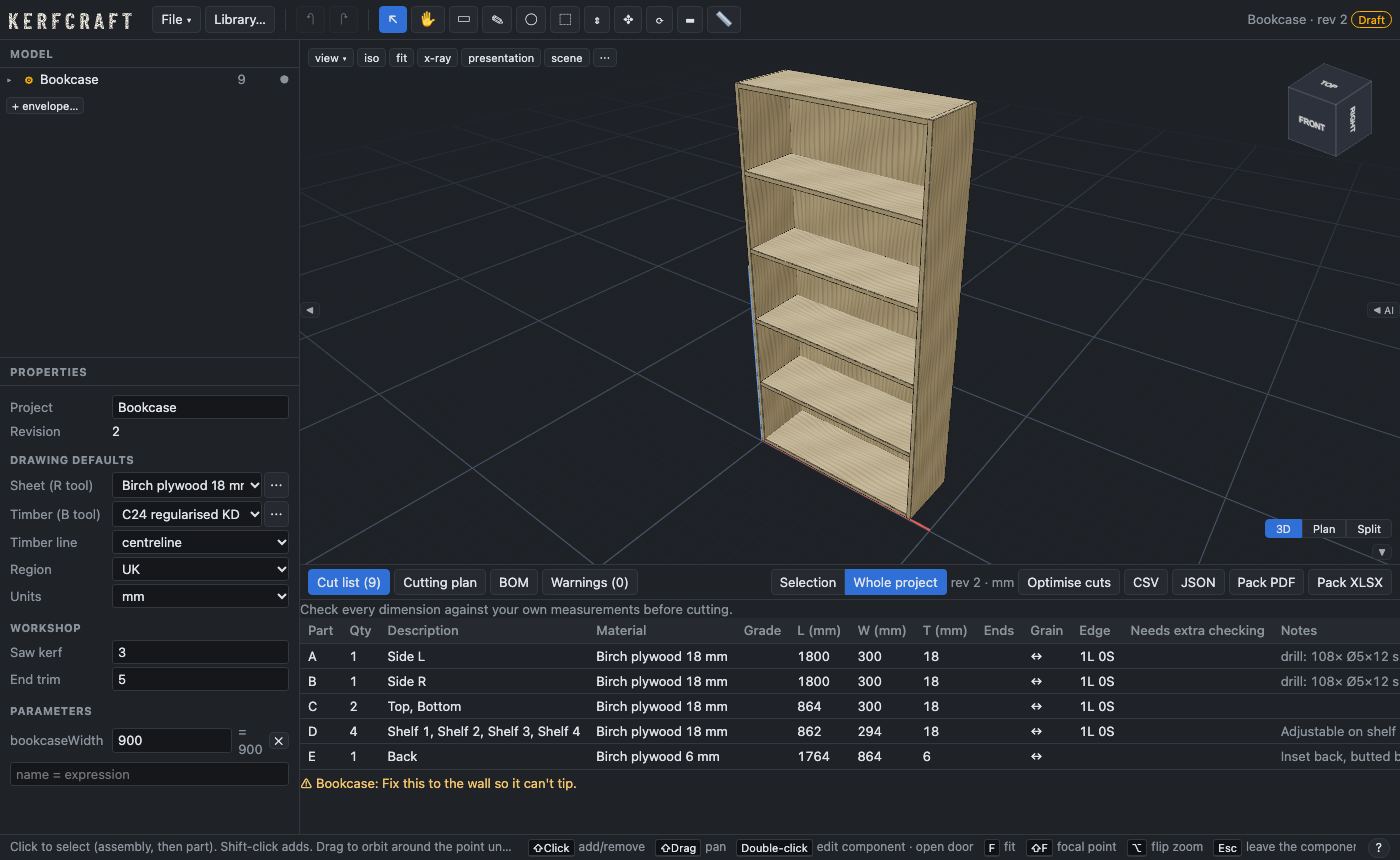
A bookcase 900 mm wide, 1800 mm high and 300 mm deep opens in the 3D view. The Model panel shows Bookcase with ⚙, the sign for a generated assembly. The tab Cut list (9) shows its 9 parts.
Change the width#
The width of this bookcase is a project parameter, bookcaseWidth. You find it under Parameters at the bottom of the Properties panel.
- Find bookcaseWidth under Parameters. It shows 900.
- Double-click the value 900 to select it.
- Type
800. - Press Enter.
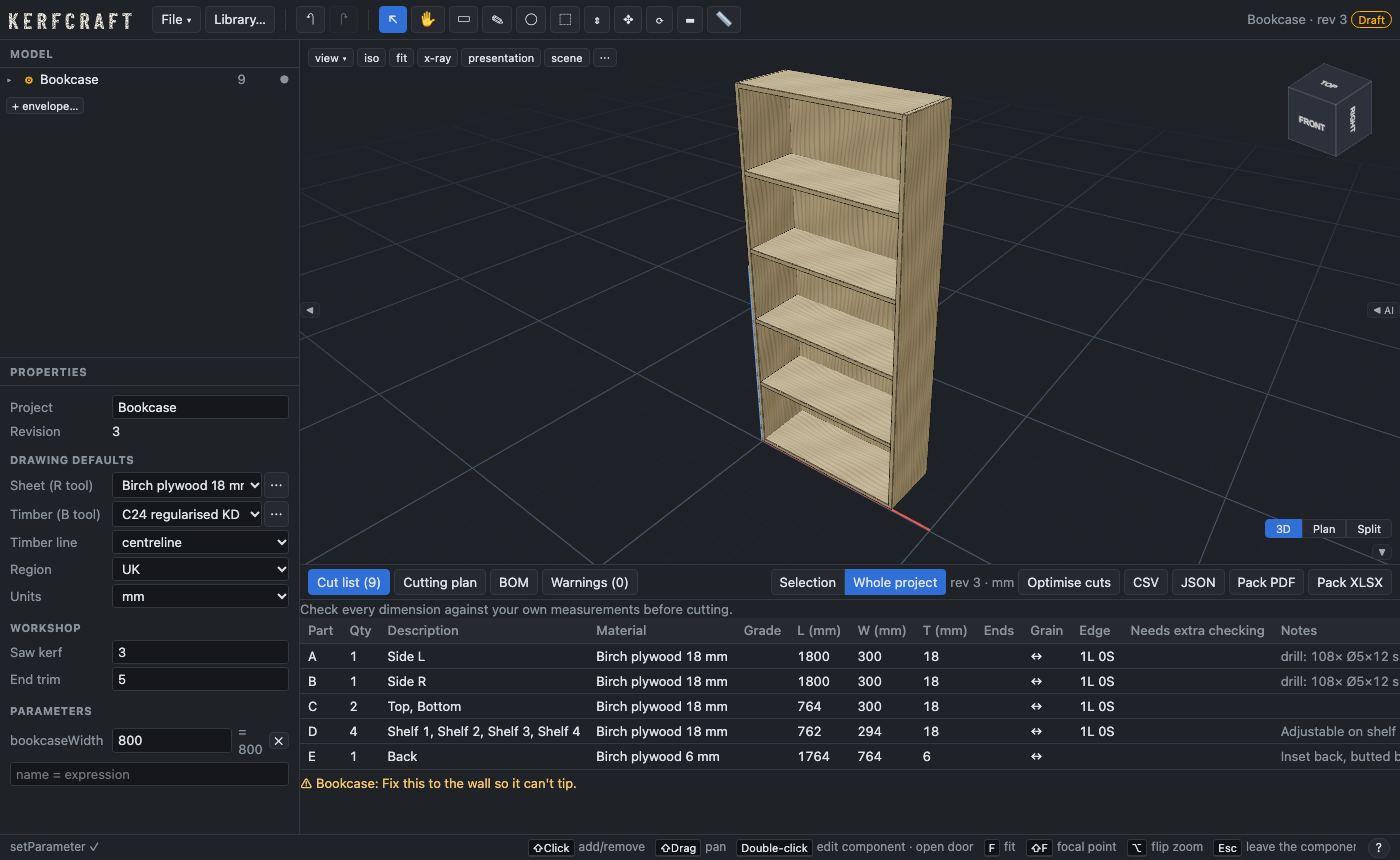
The bookcase becomes 100 mm narrower. In the cut list, the length of Top, Bottom changes from 864 to 764 mm. The shelves and the back also change.
Now look at how the bookcase uses the parameter:
- Click Bookcase in the Model panel.
- Scroll down the Properties panel to Parameters.
The width of the bookcase is bookcaseWidth, and the value next to it is 800. The other parameters, for example height, depth and shelvesPerBay, work in the same way.
Read the cut list#
- Click the Cut list (9) tab.
- Read the columns. Each row is one part, or a group of identical parts, with its material and its size.
Each row has a letter in the Part column. The Notes column tells you about machining, for example the shelf-pin holes in the sides.
Above the table, KerfCraft shows "Check every dimension against your own measurements before cutting." Do this every time. If a part has a reason in the Needs extra checking column, examine that part very carefully.
Below the table, a warning tells you to fix the bookcase to the wall so that it cannot tip.
Make a cutting plan#
- Click the Cutting plan tab.
- Click Optimise cuts.
KerfCraft calculates how to cut the parts from standard sheets. It shows how many sheets to buy, the waste, and a diagram for each sheet.
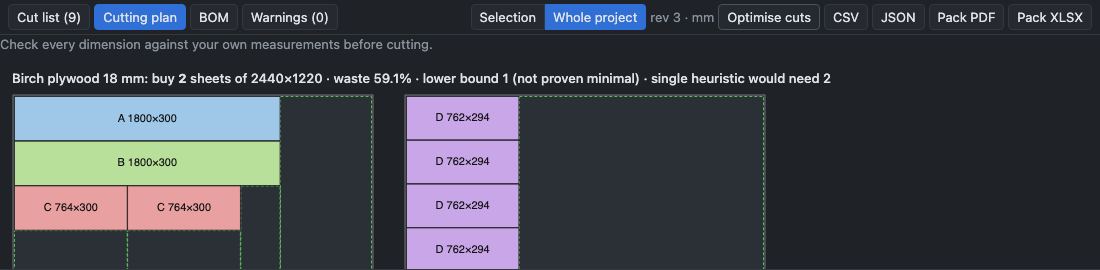
The plan uses the saw kerf and the end trim in the Workshop settings of the Properties panel. Check the plan against your own saw and your own sheets.
Export the cut list#
- Click CSV in the manufacturing panel.
Your browser downloads a file with a name like Bookcase-rev3-cutlist.csv. You can open it in a spreadsheet program. The number after rev is the revision of the design.
Save the project#
- Click File.
- Click Save….
- Click Save.
The Draft label next to the project name goes away. The project is now in File ▸ All projects….
What you learned#
- A sample project opens as a normal project that you can change.
- A project parameter controls the size of a generated assembly.
- The cut list, the cutting plan and the exports are in the manufacturing panel.
Next, draw a design yourself in Draw a workbench.