DOCS / HOW-TO GUIDES / CUT LISTS AND WORKSHOP
Follow the assembly guide
The guide puts the work in build order: all the parts first, each machining job once, and the same sub-assemblies together. Check every dimension against your own measurements before cutting.
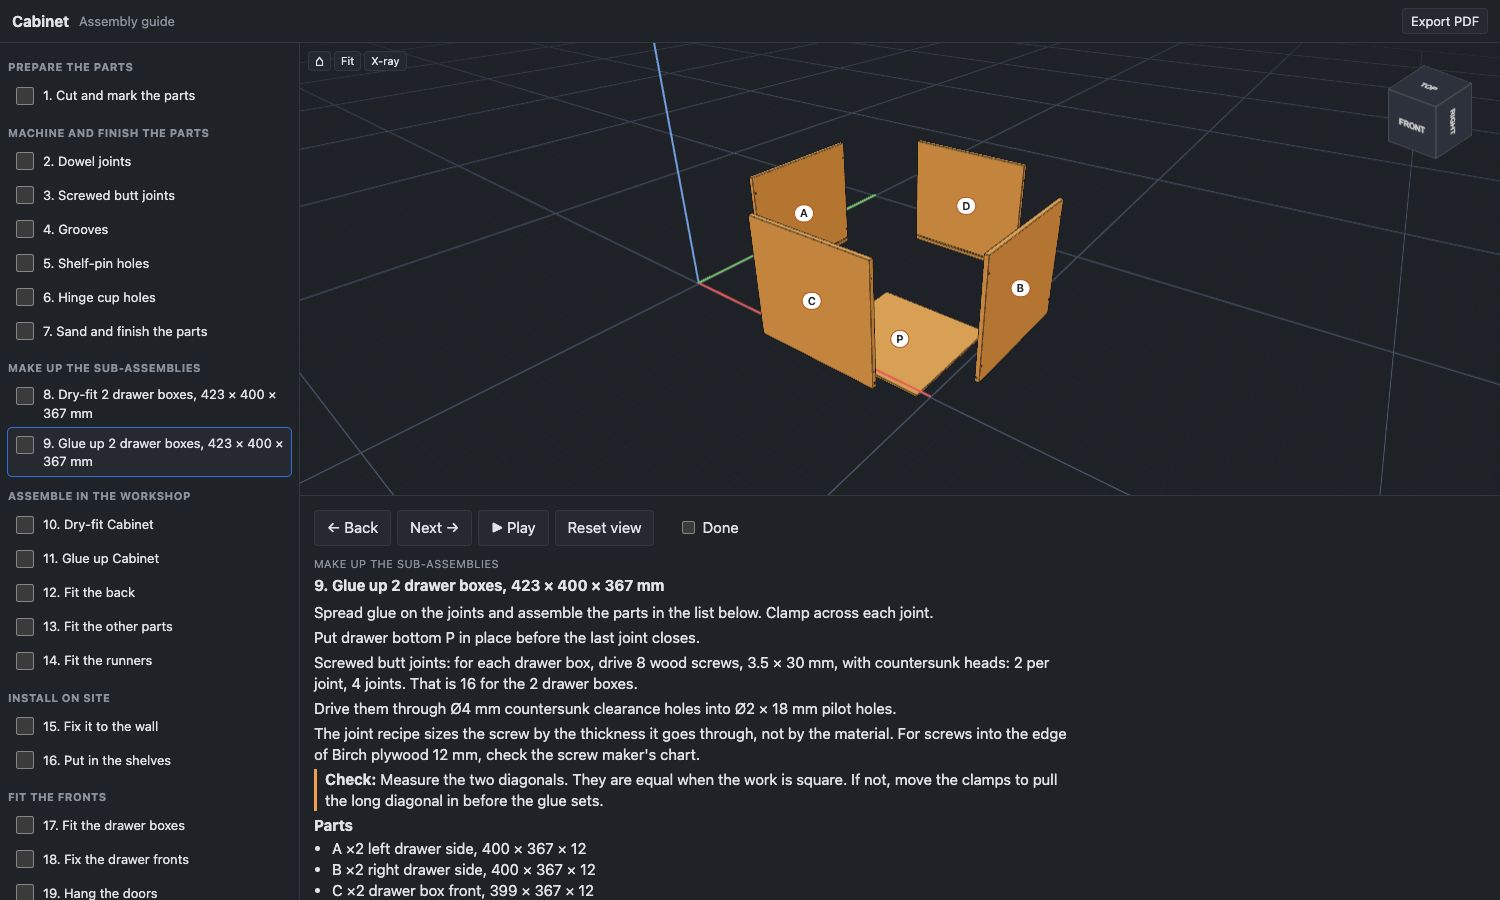
Open the guide#
- In the tab bar under the 3D view, click Whole project. For one assembly, select it and click Selection.
- Click the Guide tab.
- To use the guide at the bench, click Open in a new tab.
The page has the same steps and the same 3D view, and it fits a tablet or a phone. After a change to the model, open the page again.
The order of the steps#
The steps come from the model, in phases:
- Prepare the parts: cut and label every part, and band the edges that the model bands.
- Machine and finish the parts: one step for each operation, then the surface finish.
- Make up the sub-assemblies: the drawer boxes, door frames and other glue-ups.
- Assemble in the workshop: glue up each carcass, then fit its back, kick board and runners.
- Install on site: place and join the carcasses, scribe the fillers, fix to the wall, fit the shelves.
- Fit the fronts: the drawer boxes on their runners, the drawer fronts, the doors.
- Finish: the handles, then adjust the doors and drawer fronts.
A table or other piece with no carcass has no Install on site phase, unless the stability check says to fix it to the wall.
Parts that are the same#
Parts with the same cut-list letter are the same: the same size, material and machining. A step gives each letter once, with how many the step uses. For example, A ×10 left drawer side, 450 × 150 × 15.
Sub-assemblies and carcasses made of the same letters are one batch. The guide gives one step for all of them, for example Glue up 5 drawer boxes. Do each step on all of them before you go to the next step.
Step through the guide#
The parts of the step are orange, with their cut-list letters, pulled out from where they go.
- Read the step and its Check.
- Click ▶ Play, or press P, to slide the parts into place.
- Drag in the 3D view to look from another side. Click Reset view to go back.
- When the step is complete, select Done.
- Click Next →, or press the right arrow key.
On the page, click a step in the list to go to it. The ticks stay in this browser, and a tick on the page also shows in the Guide tab.
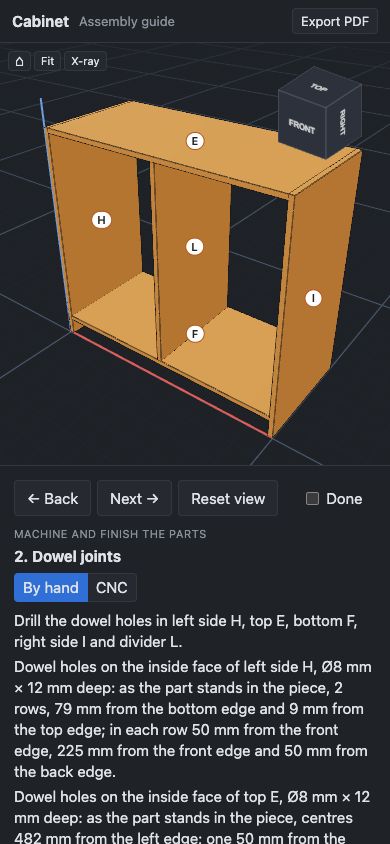
Choose CNC or by hand#
A machining step has two buttons, in the Guide tab and on the page. The project keeps the choice.
- By hand: the step gives the tools. Mark out cuts from the cut-list notes or the part drawing in the Pack PDF.
- CNC: machine the parts from a DXF file. See Export a DXF file for a CNC or laser.
A drilling step shows each joint and draws the holes of each part face, to 0.5 mm.
When the model does not say#
The model does not give every fixing, for example for a back panel or between two carcasses. The step then says so, and tells you what to choose or mark.
Print the guide#
Click Guide PDF in the Guide tab, or Export PDF on the page. Each phase starts on a new sheet, with one or two steps and their pictures on each sheet. The hole positions come at the end.
Next: the workshop pack has the same steps, with the cut list and the drawings.