DOCS / HOW-TO GUIDES / FURNITURE
Build a fitted wardrobe
A fitted wardrobe goes into the room as separate carcasses, one for each section, side by side.
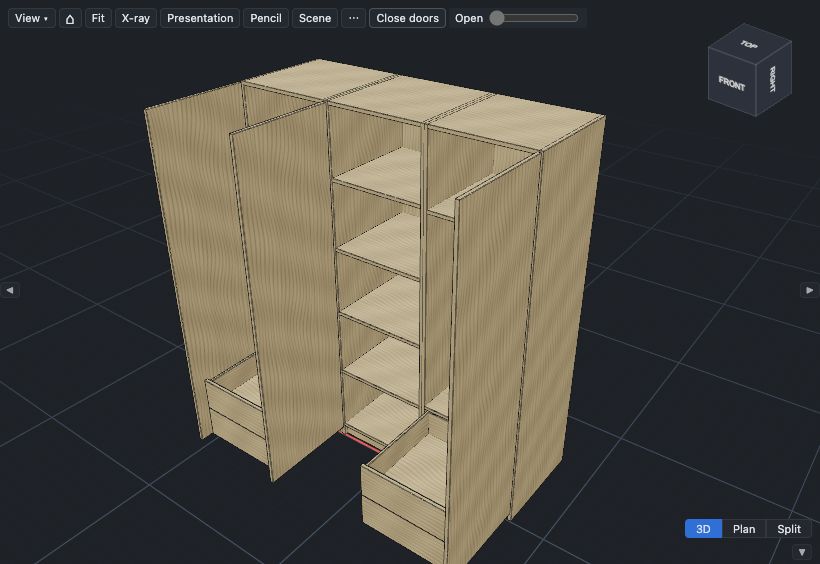
Start the wardrobe#
- Select File ▸ New ▸ Wardrobe….
- Type the Width, Height and Depth of the space.
- At Sections, type the number of sections, for example
3. - Click Create.
Each section is a carcass with its own two sides, top, bottom, back and plinth. The sections take turns: hanging, then shelves. Each section is behind one full-height door, or a pair on a section 800 mm wide or more. The hanging is under a top shelf, over 2 internal drawers. For a door on the top shelf and another on the hanging, and no drawers, clear Drawers under the hanging before you click Create. To change the contents of a cell, see Build a cabinet, bookcase or wardrobe.
Change the drawers under the hanging#
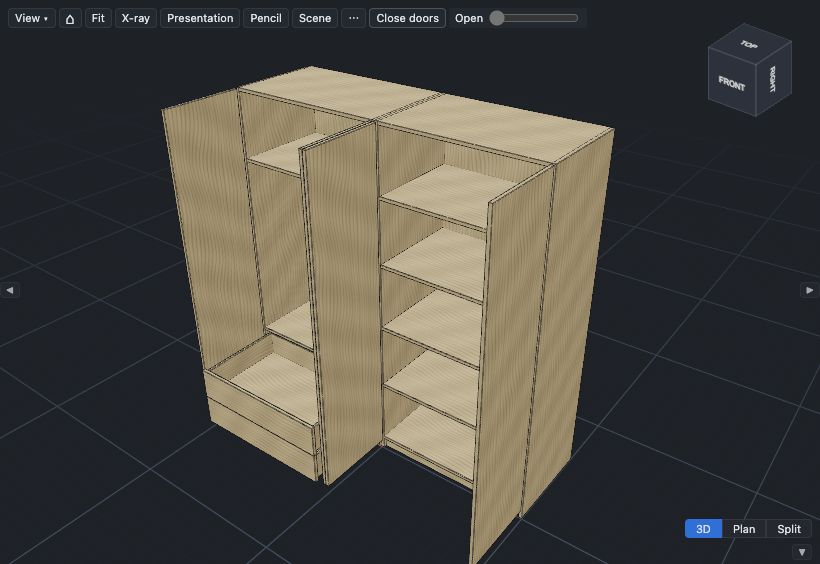
- In the grid, click the hanging section, for example A1:A2.
- Click Inside…. The grid shows the inside of the section: the top shelf, the hanging and the drawers.
- Click the drawers cell, then click Contents….
- At Number of drawers, type the number, and click the Apply to button.
- Click Layout above the grid to go back.
To divide another cell inside, select it and click Divide inside…. Use Split into rows, Merge and Contents… inside as in the carcass grid.
The drawer fronts are inset in the section, behind the doors. Their runners are on 25 mm runner spacers so that the drawers clear the door hinges. The cut list notes say this: check the spacers against your hinges before cutting.
Find a part of one carcass#
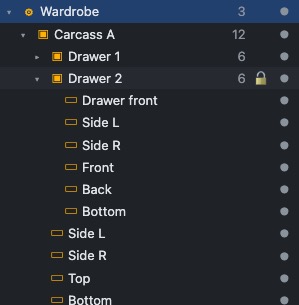
In the model tree, the wardrobe holds Carcass A, Carcass B and so on. Each drawer is a group in its carcass. In the 3D view, each click on a part goes one level in: the wardrobe, the carcass, then the part. To select a part at once, Alt-click it (Option-click on a Mac), or click its row in the model tree. The cut list names each part with its carcass, for example Carcass A › Side L. The assembly guide builds each carcass, then joins them.
Change between carcasses and one frame#
- Select the wardrobe.
- Click All settings.
- In Size, at Construction: one frame or separate carcasses, select One frame or Separate carcasses.
One frame makes one carcass with one divider between two columns. Separate carcasses puts two sides there, one for each carcass. Auto columns share the width that is left after the sides, so the overall width does not change. If Fixed columns make the carcasses wider than Width, a warning shows the fix. A merged cell across two columns keeps the two columns in one carcass.
Put sliding doors on a section#
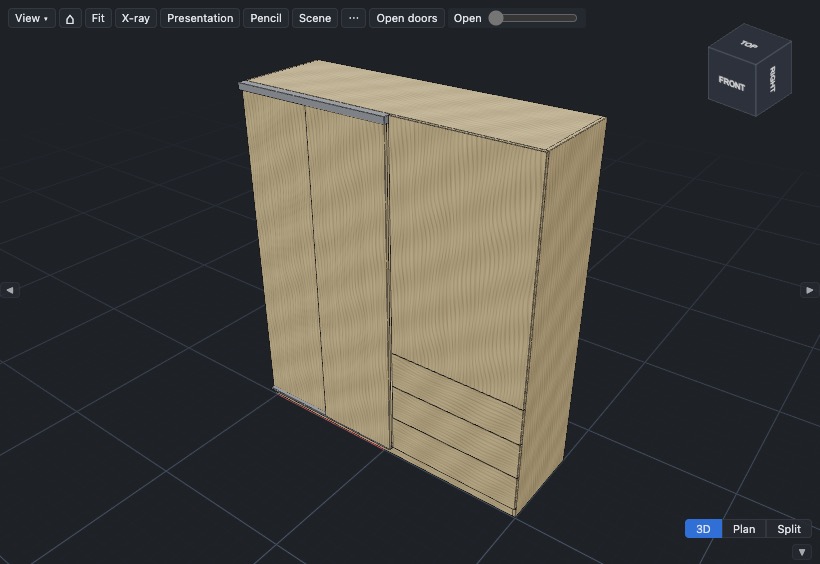
- In the grid, click the section, for example A1:A2.
- Click Contents….
- At Front, select Sliding doors.
- At Leaves, type the number of leaves, from 2 to 6.
- Click the Apply to button.
The section gets its own top track and bottom guide, in front of the carcass. Other sections keep their hinged doors. Drawers behind sliding doors are internal. Sliding doors need a level top: under a raked top, a warning offers a pair of doors.